
Whether you want to supplement instruction for your in-person class or you teach a fully online course (like me), you’re probably looking for effective ways to deliver content and maintain student engagement. Online learning is a different landscape thanks to sites like Khan Academy, the rapid adoption of MOOCs, and digital pedagogies (including blended and flipped classrooms). While online lectures aren’t the only medium for online instruction, they can be a powerful one, and can play a strategic part in how you teach. Short, focused discussions of key concepts or ideas can be a great way to support student learning when they’re working independently or at a distance. For example, if you want to share content quickly in a condensed format, micro-lectures can help cut out excessive verbiage. Beyond creating a good learning experience for students, being conversant about effective online teaching can be a big help when you’re doing a job search.
This summer I’m teaching a fully online course and one of my big concerns for online teaching is maintaining a high level of student engagement. One of the ways I’m approaching this is through regular use of focused 5-minute videos. Today I want to share some strategies that I’ve found helpful in preparing videos for online learning. I’ll discuss the nuts and bolts of how to record a short presentation, then I’ll talk about some strategies I find helpful to integrate the videos into my course.
1. Planning Your Presentation
Since producing videos can potentially take a lot of time, it’s good to have a clear plan of what you want to cover in your talk (and how you want students to process/engage with this material). Depending on how you like to work, it might make sense to draft a thorough outline or write out a full script of what you plan to say. Alongside this, you’ll want to select an appropriate visual aid (such as turning your webcam toward a whiteboard, or creating a set of slides). I like to approach this with the same process I use for in-person teaching, and then identifying the pieces that can work as a stand-alone video.
2. Software
There are a lot of options out there for producing videos for the web. If you’re like me, you probably don’t want to spend a lot of money, take a lot of extra time, or have your editing process spiral out of control. It’s okay to keep the videos basic and straightforward. At the very least, you’ll want software for recording your webcam and/or your computer screen with a voiceover. Here are a few options:
- Camtasia Studio (With .edu license for $179 PC; $75 Mac). Camtasia Studio is robust. It can take you through every step of the production process from recording, editing, and formatting your video for the web. This program is ideal if you want your videos to look professional, plan to do extensive editing, and it has some great options for integrating PowerPoint presentations (such as generating a table of contents and captions from your presentations notes).
- Snagit (With .edu license $29.95). From the same developers as Camtasia, Snagit is great if you’re only looking to record your screen and want to forego extensive editing and formatting. This is ideal if you just want to record what’s on your screen with a voiceover and then quickly publish to the web.
- Explain Everything – (iOS, Android, Windows, $4.99/month with group education licenses available). This app is great if you’re working with a touch interface (i.e. tablet or touch enabled screen) and can incorporate images, illustrations, and animation. The app lets you edit on the fly, and given the relatively low monthly fee, it could be good for a trial run.
But wait a second, I don’t want to spend any money to do this:
- Mac users can do screen recording with QuickTime Player.
- If you’re on Windows 10 you can use the Xbox app (weird, but free).
- Check with your institution, they often acquire group licenses for instructional software, so you may be able to get something for free.
- There’s a lot of free third-party software out there for screen recording, but with any software, you’re downloading that at your own risk (But if you have any good recommendations, please share in the comments).
3. Recording Your Talk
Once you have a solid outline, visuals, and the right software, it’s time to record. When I started out, I encountered a lot of trial and error in getting used to the format and just the general awkwardness of making a video of myself. Out of a concern for time, I avoid making these talks overly elaborate. Once I’m in the rhythm of recording videos, they’re quick–ideally not much longer than I would spend actually giving them in person. Here’s a few ideas to make it easier:
- Perfection is your enemy. You want your videos to be helpful to students, but you shouldn’t be spending hours to get the perfect take of a 5 minute video. Give yourself a little time to practice and feel comfortable with your talk, then try to do the whole recording in one take without stopping. You might say “uh…um” a few times, but don’t let that derail you. I can say from experience that if you stop and restart each time you misspeak, it will take you FOREVER… and nobody wants that.
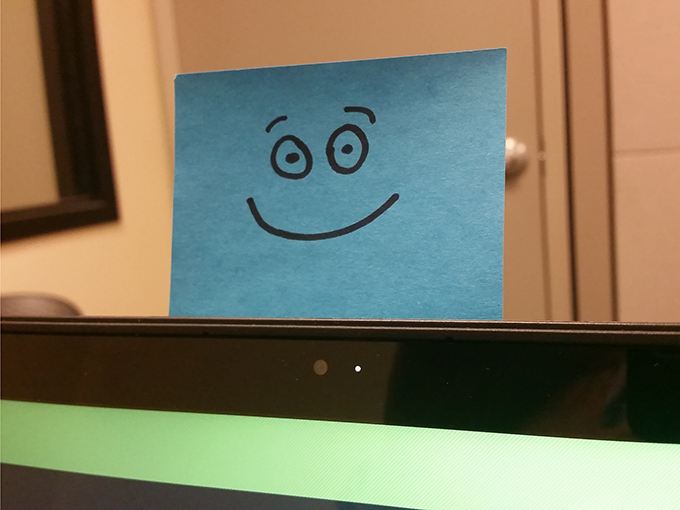
- Connect with your audience. You want to be expressive, not a monotone drone. I find it helps to have something in the line of sight of your camera to connect with. I happen to use a post-it with a smiley face just to give me someone I can make eye contact with.
- Be yourself. Since I’m teaching a fully online class and won’t meet my students in person, I’m really drawn to using video since it’s a way that I can share my personality and excitement with my students. This includes using humor. If my only interaction with them is text-based through email or online discussions, that makes their investment in the class that much more difficult. It’s one thing for a faceless teacher to send out assignments and write feedback, and it’s quite another to get to share your excitement about what you teach with your students.
- If you’re not sure where to start, try making a video tour of your course website. This can help you figure out a process that works for you, and you can create a simple resource for students to better utilize your site.
4. Make the Video Accessible
Although using video is a great medium to deliver content online in a more personal format, it’s important to also recognize ways of making your content accessible to all students who might take your class. If you like to write out your lectures word-for-word, include a full-text PDF to go along with your video. If you’re lecturing from a PowerPoint, programs like Camtasia Studio have features to help you add captions to your videos using slide notes. If you don’t mind your videos being public, YouTube has a few options for captions, including automatic captioning using speech recognition.
5. Weave the Video into Other Learning Activities
If you’re going to the trouble of recording videos, then ultimately you want them to enhance student learning. I like to have moments in videos where I dovetail the content I’m sharing with the next thing students are supposed to do. Just like how I verbally transition between lecturing and a group discussion in an in-person class, I have my videos do the same thing. Here are some ideas:
- Use videos as a regular way to check-in with students. My online course this summer runs for about fourteen weeks, and given my schedule, I want to make sure my students can keep pace. At the start of my class I made a short video where I summarized my syllabus, then gave a short tour of the course website. Going forward, I’ll be making short weekly videos where I describe the important assignments and activities for each week. This is a great opportunity to link activities together with a narrative that will lend more continuity from week to week.
- Pose questions at the end of a video to kick-start an online conversation. For example, my online class will involve weekly assigned readings from different authors with a corresponding online discussion. To introduce a reading, I start by sharing some background about the author, providing a brief synopsis of the reading, and then describe the discussion prompt verbally.
- Create opportunities to apply knowledge immediately after a video. I happen to teach a writing class, so I’ve made a video where I demonstrate doing a rhetorical analysis of a short text. In the video, I go through the steps of analyzing an example text the same way that I would if I were using an overhead projector. At the conclusion of my video, I assign students to do the same with a different example text and share their ideas on a discussion board. This is great for students because they can start out with a model, and refer back to it, or skip to other parts of the video as they need.
To conclude, encourage your class to talk back. Online videos don’t need to be a one-way street, and where they’re appropriate, they can be part of the larger conversation in your course. Depending on resources available to your students, they can also share short videos as a way of participating. For example, students might enjoy the option of composing a response video as opposed to a response post on a discussion board. You can use video as a method for giving feedback on student writing (and when done well, can be a lot faster than written feedback). Beyond that, you can also validate students’ contributions by mentioning their participation in your own videos: “Thanks to Madison for sharing the great video…” “I’d like to take up the question that Alexa posed in the discussion week…”
Author Bio:Travis Grandy is a PhD student in Composition and Rhetoric at the University of Massachusetts Amherst.